The One Percent
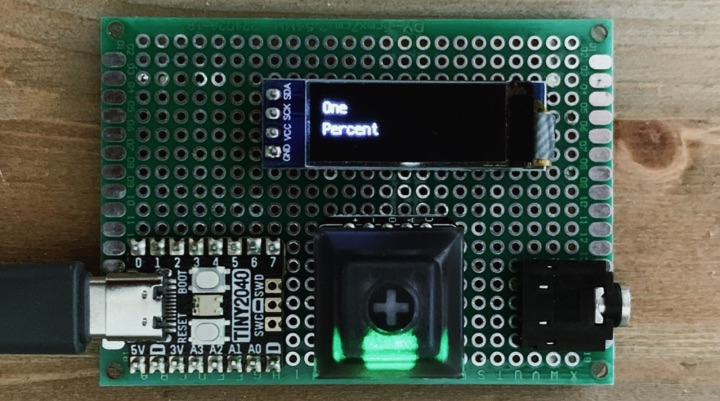
The first keyboard I built had noticeably fewer keys than a standard, or even laptop one — broadly speaking, a “40%” in keyboard circles. My next one went even further, a 30%. This raises the question; how minimal could I get? In answer to that, I present the One Percent keyboard:
But, you may ask, how can you type anything on a keyboard with only one key? Fortunately, that was a question answered almost two hundred years ago:
As you can see in the video, you can plug in a real Morse key, or use the built-in MX switch. Either way, the interpretation of the morse code happens on the device — as far as the computer is concerned, it’s just a standard USB keyboard. Perhaps not the most practical one in the world, but a keyboard nonetheless.
The genesis of this project was a long while ago, when I came across this project. I thought it’d be a fun way to take the next step from building kit keyboards, and also a good reason to try out the Raspberry Pi Pico. I acquired a Pico and some Adafruit NeoKeys, but by the time they had arrived I’d decided to go off-piste and try something a bit different. Before too long, I had a breadboard prototype:
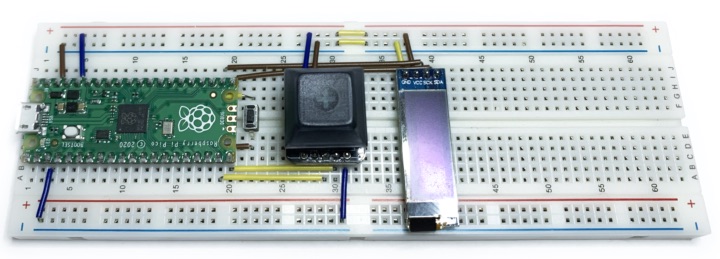
In addition to the Pico, the NeoKey provides a hot-swap socket for a standard MX key switch. It also includes a NeoPixel for RGB illumination. I also added a small (128x32) OLED display to provide feedback while typing; this makes it a lot easier to understand how the board is interpreting your taps, especially for someone who doesn’t know Morse code (like me).
On the code side, I went for CircuitPython — it’s well supported by the RP2040, and comes with libraries to support NeoPixels and USB HID devices. Moreover, the trivial transfer-and-run approach allows for very rapid iteration, and makes it a joy to use.
The process of writing the software was an interesting exercise in unlearning a few decades of instinct. Initially, I was pleasantly surprised to discover that CircuitPython supports async/await, and I immediately started to use these to allow fairly straightforward code that would nevertheless let other stuff run when necessary. It was only later I asked the in-retrospect-obvious question; what other stuff? I’ve spent so long working in multitasking environments, where a single logical processor will be running dozens or hundreds of things concurrently, that I’ve internalised that as a key part of my mental model of computation. Programming a microcontroller for an embedded device is more like programming an 80s home computer — you’ve got the entire thing at your disposal, and it’s up to you what you do with it. This reminder alone made the project worthwhile.
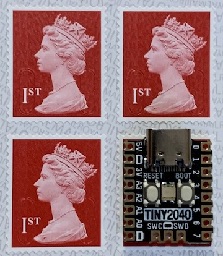
At this point, both hardware and software were working. However, I didn’t want to leave this as temporary prototype to be disassembled the next time I wanted to reuse the parts. I wanted it to be something more real, or at least more permanent. To this end, I decided to use the Tiny2040 from Pimoroni. This is built around the same RP2040 processor as the Raspberry Pi Pico, but on a smaller board (with fewer external connections, but not in a way that affects this project).
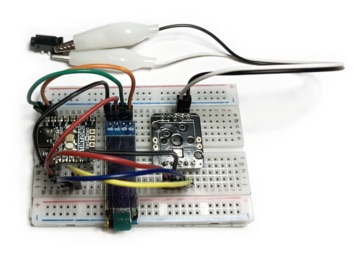
A few tweak to the software and everything works as expected. I also added a 3.5mm jack to allow a real Morse key to be added. I came across the Kanga Nano Key on eBay, and it does the job nicely, but any other key (modern or antique) should be easy to wire up.
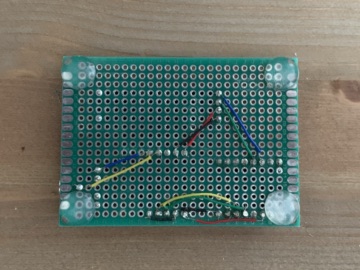
Unfortunately, a variety of other commitments meant I had to shelve the project for while, but a couple of weeks ago I found time to pick it up again and do the final step of soldering it all up on a protoboard, as seen at the top of this post. Not the neatest work, by any means, but it’s functional, and I’m more than happy with the result.
I’ve put the code on GitHub, along with schematics. I wouldn’t hold it up as a great example of style, but if you’re looking to learn too then it might be useful, if only to make you feel better about your own progress.
Overall, I’m really pleased with how the project worked out. I don’t make any claims to originality — there have been plenty of previous morse keyboards and similar projects — but my aim was to try something new, and to learn things, and I certainly have. My next build is likely to be more run-of-the-mill, but I’m sure I’ll return to this kind of thing before too long. However long that takes, I’ll have a tangible reminder of the possibilities.